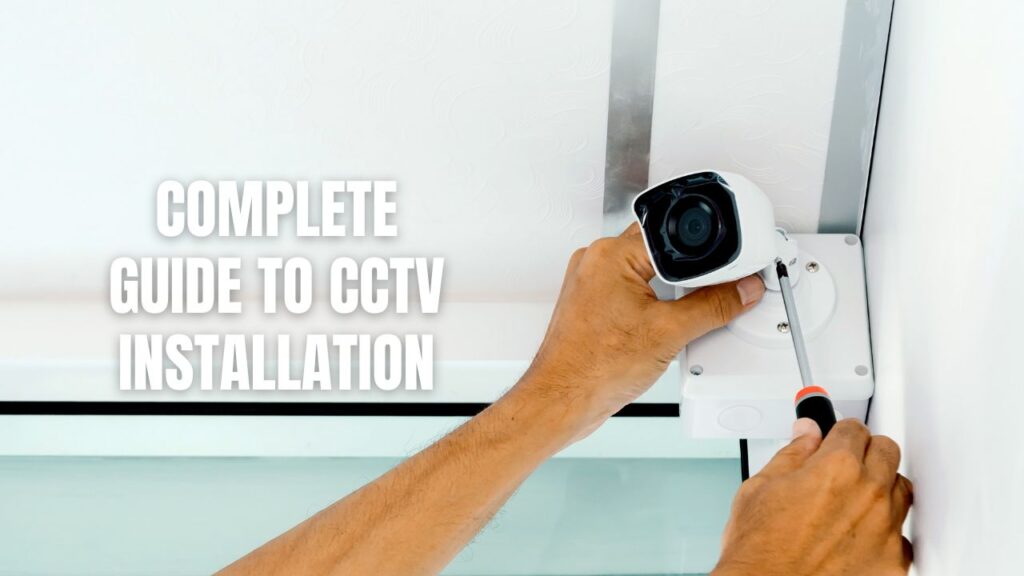
Installing an outdoor CCTV camera means picking the right spot, mounting the unit securely, connecting the power and network, and testing the video feed — all steps we can walk you through right now.
Getting a security camera up and running outside your home is a lot less scary than it sounds. Whether you’re going wired, wireless, or solar-powered, the process follows the same basic path. Let’s break it down.
Key Takeaways:
- Gather your tools first — drill, screws, wall anchors, cables, and your camera kit.
- Pick smart locations — front door, back door, driveway, and garage are top priority spots.
- Set up the app before mounting — pair your camera to your phone while it’s still in your hands.
- Mount at 8–10 feet high — this keeps the camera out of reach and gives a wide field of view.
- Test everything — check night vision, motion detection, and live feed before calling it done.
- Check local laws — never point your camera at a neighbor’s property.
Step 1: Gather Your Tools and Equipment
Before anything else, pull together everything you need. Running up and down a ladder mid-install is no fun.
Here’s what to have on hand:
| Tool / Item | What It’s For |
|---|---|
| CCTV camera kit | Camera, mounting bracket, and cables |
| Power drill + bits | Making pilot holes in walls |
| Screws and wall anchors | Securing the mount firmly |
| Ethernet cable (Cat5e/Cat6) | Wired or PoE camera connections |
| Cable clips or zip ties | Keeping wires tidy and tamper-resistant |
| Ladder | Reaching the 8–10 foot mounting height |
| Waterproof junction box | Protecting cable connections from rain |
| Screwdrivers | Tightening everything up |
Got everything? Great — let’s move on.
Step 2: Choose the Best Location
Placement is everything in outdoor surveillance. A camera in the wrong spot leaves gaps that anyone could slip through.
Top Spots to Cover
- Front door — Around 34% of break-ins happen right at the main entrance. This is your number-one priority.
- Back and side doors — Secondary entry points that burglars love because they’re out of sight.
- Driveway — Catches vehicle movement and gives you a clear view of who’s coming and going.
- Garage and outbuildings — High-value targets for tools and equipment theft.
- Yard with a wide angle — Ideal for catching movement before someone even reaches the house.
Placement Tips
- Mount 8–10 feet off the ground — high enough to prevent tampering, low enough for a clear face shot.
- Tuck cameras under eaves or gutters to shield them from rain, wind, and direct sun.
- Angle away from direct sunlight to avoid washed-out footage and lens glare.
- Double-check for blind spots before drilling a single hole.
Step 3: Set Up the Camera Before You Mount It
Here’s a tip that’ll save you a ton of time: configure your camera while it’s still at eye level.
- Download the manufacturer’s app on your smartphone.
- For wireless cameras, connect to your Wi-Fi network and confirm the signal is strong at the install location.
- For wired cameras, do a quick bench test — run the cable to your DVR or NVR and check the live feed.
- Adjust any focus or image settings now, so you’re not squinting at a screen from the top of a ladder later.
This step only takes a few minutes, and it makes everything after it way smoother.
Step 4: Mount the Camera
Now it’s time to put the camera where it belongs.
- Mark your drill spots — hold the mounting bracket against the wall and mark each hole with a pencil.
- Drill pilot holes and tap in wall anchors for a solid grip, especially on brick or stucco.
- Screw the bracket firmly to the wall — give it a tug to make sure it’s not going anywhere.
- Run your cables — for wired setups, drill a hole (about 1 inch wide) through the wall and feed the cable through, or use a junction box to hide the connection neatly.
- Attach the camera to the bracket and lock it in place according to the manufacturer’s guide.
Step 5: Connect Power and Network
How you power your camera depends on the type you’re working with.
| Camera Type | What To Do |
|---|---|
| Battery-powered | Install batteries and close the compartment securely |
| Solar-powered | Mount the solar panel where it gets maximum sun throughout the day |
| Wired / PoE | Run an Ethernet cable from the camera back to your router or NVR; secure it with cable clips every 12–18 inches |
| Coaxial CCTV | Connect BNC connectors and match power wires (red to red, black to black); wrap exposed connections with weatherproof tape |
Use weatherproof cable covers or a junction box anywhere cables are exposed to the elements. This protects your wiring and keeps your install looking clean.
Step 6: Test and Adjust
Don’t skip this step — it’s where you confirm the whole setup actually works.
- Check the live feed through your DVR/NVR monitor or the mobile app.
- Adjust the camera angle if there are any blind spots or the framing is off.
- Test motion detection by walking through the camera’s field of view.
- Check night vision by dimming the lights or testing after sunset.
- Verify two-way audio if your camera has a built-in speaker and microphone.
- Fine-tune the focus if the image looks soft or blurry.
Once everything looks sharp and responsive, your security camera installation is officially done.
Key Specs to Look For in an Outdoor CCTV Camera
Not all cameras are built the same. Here are the specs that actually matter for outdoor use:
| Feature | What We Recommend |
|---|---|
| IP Rating | IP65 or higher — fully dust-tight and protected against heavy rain |
| Resolution | 1080p HD minimum; go for 2K or 4K if you want license plate-level detail |
| Field of View | At least 120°; 180° is even better for wide open areas |
| Night Vision | Infrared (IR) is the standard for outdoor cameras; color night vision is a bonus |
| Storage | Cloud, local SD card, or NVR/DVR — choose based on your privacy and budget needs |
| Power Source | PoE is the most reliable; solar is great for off-grid spots |
FAQs About Outdoor CCTV Installation
Do I need a professional to install an outdoor CCTV camera?
Not necessarily. Many modern cameras are built for DIY installation and come with everything you need right in the box. That said, for larger systems with multiple cameras, conduit wiring, or NVR setups, professional home security installation makes the job faster and cleaner.
Can outdoor CCTV cameras work without Wi-Fi?
Yes! Wired cameras that connect via coaxial cable or Ethernet to a DVR or NVR record footage locally and don’t need Wi-Fi at all. Battery-powered and solar cameras usually do need Wi-Fi for remote viewing, though some offer local SD card storage as a backup.
How high should I mount an outdoor security camera?
Mount it 8 to 10 feet off the ground. This height is high enough to prevent tampering but low enough to still capture a clear facial image. Going higher than 10 feet reduces the quality of footage on people’s faces.
Is it legal to install CCTV cameras outside my home?
In most places, yes — you’re allowed to monitor your own property. The main rule to follow: don’t point your camera at a neighbor’s property, backyard, or windows. Always check your local laws and HOA rules if applicable.
What’s the difference between IP cameras and analog CCTV cameras?
IP cameras (Internet Protocol) send video over a network connection and usually offer higher resolution, remote access, and smart features like motion alerts. Analog CCTV cameras use coaxial cables and are older technology, but they’re still reliable and cost-effective for basic surveillance setups. For most homeowners today, IP cameras are the go-to choice.
Additional Details Worth Knowing
- Vandal-resistant ratings (IK ratings) matter as much as weatherproofing — look for IK08 or IK10 if the camera is in a low or reachable area.
- Power over Ethernet (PoE) simplifies wired installs by carrying both power and data through a single Ethernet cable, so you only need one wire per camera.
- Motion-triggered recording saves storage space compared to 24/7 continuous recording, and most modern systems let you set motion sensitivity zones right in the app.
- If your home already has a home security system, many CCTV cameras can integrate directly with it for unified monitoring and alerts.
- For systems already in place, it’s worth checking whether a security system upgrade or repair might be the smarter move before buying brand-new hardware.
Ready To Get Your Outdoor CCTV Up and Running?
Installing an outdoor CCTV camera is one of the best moves you can make for your home’s safety. From picking the right location to testing night vision after dark, every step in this guide gets you closer to a home that’s covered around the clock.
If you’d rather have an expert handle the whole thing — or you want a full home security system built around your property — the team at Callaway Security & Sound is ready to help. Get in touch today and let’s figure out the best setup for your home.