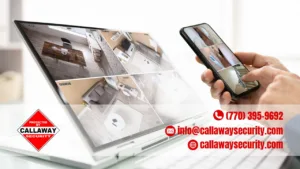
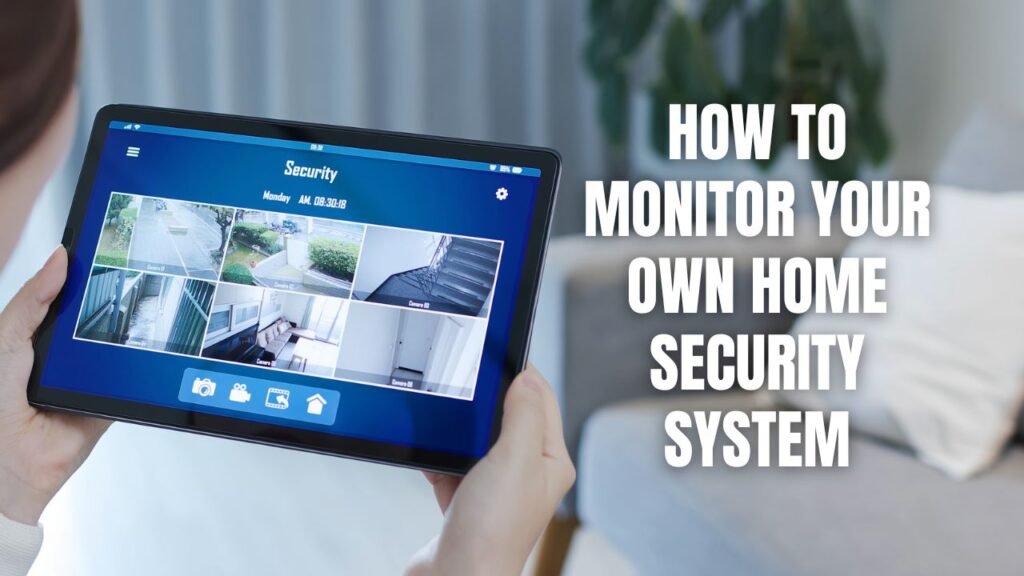
How To Monitor Your Own Home Security System

How To Monitor Your Own Home Security System

Monitor your own home security system by choosing self-monitoring compatible equipment (SimpliSafe, Ring, Abode), installing sensors at all entry points and motion detectors in key areas, connecting everything to your smartphone via manufacturer app with push notifications enabled, configuring alert settings to avoid notification overload, establishing a clear response plan for alerts (check cameras, call 911 if real threat), and testing monthly to ensure all components function properly. Self-monitoring eliminates monthly monitoring fees but requires you to personally respond to every alert 24/7.

Self-monitoring your home security system saves $300-600 annually in professional monitoring fees while maintaining direct control over your home’s protection. However, success requires the right equipment, proper setup, disciplined alert response, and understanding the trade-offs between DIY monitoring and professional services.

Self-Monitoring Fundamentals:

  • Monthly savings = $25-50 (professional monitoring fees eliminated)
  • Equipment compatibility = System must support self-monitoring without contract
  • Your responsibility = Responding to alerts, calling emergency services, system maintenance
  • 24/7 commitment = Must respond to alerts anytime, including sleep/vacation
  • Technology required = Smartphone, reliable internet/cellular, backup power
  • Trade-offs = Lower cost vs. reduced protection when unavailable
Callaway security ad scaled

Step 1: Choose Self-Monitoring Compatible System

Not all security systems work well for self-monitoring.

Best Systems for Self-Monitoring

Top self-monitoring platforms:

SimpliSafe:

  • No contract required
  • Free basic self-monitoring (push alerts)
  • Optional paid monitoring ($18-29/month)
  • Easy DIY installation
  • Cost: $200-500 for starter system

Ring Alarm:

  • Amazon ecosystem integration
  • Optional monitoring ($20/month)
  • Works with Ring cameras
  • Alexa voice control
  • Cost: $200-300 for starter kit

Abode:

  • Flexible monitoring options
  • Professional monitoring available on-demand
  • HomeKit/Google/Alexa compatible
  • Advanced automation features
  • Cost: $280-500 for starter system

Wyze Home Monitoring:

  • Budget-friendly option
  • Optional monitoring ($10/month)
  • Integration with Wyze cameras
  • Basic but functional
  • Cost: $60-150 for starter system

ADT Self Setup:

  • ADT equipment without contract
  • Optional professional monitoring add-on
  • Same quality as traditional ADT
  • DIY installation
  • Cost: $200-400 for starter system

Essential System Features

Must-have capabilities for effective self-monitoring:

Mobile app with instant alerts:

  • Push notifications within seconds
  • Detailed event information
  • Remote arm/disarm capability
  • Live camera viewing
  • Activity log/history

Loud local siren:

  • 100+ decibel alarm
  • Built into hub/base station
  • Deters intruders
  • Alerts neighbors
  • Continues sounding even if internet down

Comprehensive sensors:

  • Door/window contact sensors
  • Motion detectors (PIR)
  • Glass break sensors
  • Optional: smoke/CO, water leak, freeze
  • Wireless for easy installation

Camera integration:

  • Live video streaming
  • Motion-triggered recording
  • Night vision capability
  • Two-way audio
  • Cloud or local storage options

Backup connectivity:

  • Cellular backup (critical)
  • Continues alerting if internet fails
  • Battery backup for power outages
  • Maintains protection 24/7

Step 2: Install Sensors and Cameras Strategically

Proper installation maximizes coverage and minimizes false alarms.

Entry Point Protection

Door and window sensors:

Where to install:

  • All ground-floor doors (front, back, side, garage)
  • Basement doors and windows
  • Ground-floor windows accessible from outside
  • Second-floor windows near roof access
  • Sliding glass doors

Installation tips:

  1. Clean mounting surfaces (alcohol wipe)
  2. Align sensor and magnet properly (within 1 inch)
  3. Test before permanent mounting
  4. Use adhesive for rental-friendly installation
  5. Screw mounting for maximum security

Typical sensor count:

  • Small home (1,000 sq ft): 8-12 sensors
  • Medium home (2,000 sq ft): 12-18 sensors
  • Large home (3,000+ sq ft): 20-30+ sensors

Motion Detector Placement

Strategic interior coverage:

Prime locations:

  • Main hallway (choke point)
  • Top and bottom of stairs
  • Living room entry
  • Master bedroom hallway
  • Kitchen entry (if not triggering pets)

Mounting guidelines:

  • Height: 6-7 feet on wall
  • Corner placement for maximum coverage
  • Angled toward likely entry paths
  • Away from heating vents (false triggers)
  • Consider pet immunity if applicable

Motion detector count:

  • Small home: 2-3 detectors
  • Medium home: 3-5 detectors
  • Large home: 5-8+ detectors

Camera Coverage

Exterior camera placement:

Essential locations:

  • Front door/porch (doorbell camera ideal)
  • Driveway (captures vehicles, license plates)
  • Backyard access points
  • Garage doors
  • Side yards (if accessible)

Mounting best practices:

  • Height: 8-10 feet (out of reach)
  • Downward angle: 15-30 degrees
  • Protected from weather
  • Near power source or use wireless
  • Test night vision coverage

Interior camera placement:

Strategic indoor coverage:

  • Main living room
  • Hallway overlooking stairs
  • Kitchen (if desired)
  • Basement entrance

Privacy considerations:

  • Never in bathrooms or bedrooms (guests/family)
  • Inform all household members
  • Disable when home if preferred
  • Secure camera access with passwords

Wired vs. Wireless Considerations

Wireless sensors/cameras (recommended for DIY):

  • Easy installation
  • No drilling through walls
  • Relocatable
  • Battery-powered (require replacement)
  • Wi-Fi dependent

Wired systems:

  • More reliable
  • No battery changes
  • Professional installation typically needed
  • Permanent placement
  • Better for new construction

Step 3: Connect System to Smartphone

Mobile app access is critical for self-monitoring.

App Setup and Configuration

Initial setup process:

  1. Download manufacturer app
    • iOS App Store or Google Play
    • Create account with strong password
    • Enable two-factor authentication
  2. Add control hub/base station
    • Power on hub
    • Connect to home Wi-Fi
    • Scan QR code or follow pairing process
    • Update firmware immediately
  3. Pair sensors and cameras
    • Follow app prompts for each device
    • Name clearly: “Front Door,” “Garage Motion,” “Driveway Camera”
    • Assign to rooms/zones for organization
    • Test each sensor during setup
  4. Configure user accounts
    • Primary account (full access)
    • Additional users (family members)
    • Guest accounts (temporary access)
    • Set permissions for each user

Notification Settings

Alert optimization:

Critical alerts (push notifications):

  • Alarm triggered
  • Entry doors opened (when armed)
  • Motion detected (when armed away)
  • Camera motion (specific zones only)
  • System tamper alerts

Informational alerts (email or in-app):

  • System armed/disarmed
  • Low battery warnings
  • Offline device notifications
  • Daily activity summary

Alert timing:

  • Instant push for emergencies
  • Batch non-critical notifications
  • Quiet hours for non-emergencies
  • Escalation if not acknowledged

Network Security

Protecting your system:

Wi-Fi security:

  • WPA3 encryption (or WPA2 minimum)
  • Strong unique password
  • Hidden SSID (optional)
  • Guest network for IoT devices
  • Regular router firmware updates

App security:

  • Strong unique passwords
  • Two-factor authentication enabled
  • Biometric login (fingerprint/face)
  • Auto-logout after inactivity
  • Regular password changes

Camera security:

  • Change default passwords
  • Disable remote access if not needed
  • Use VPN for remote viewing
  • Review access logs periodically

Step 4: Configure Smart Alert Settings

Effective self-monitoring requires usable, not overwhelming, notifications.

Arming Modes

Home/Stay mode:

  • Entry sensors active
  • Interior motion disabled
  • Glass break active
  • Use when home/sleeping
  • Allows movement inside

Away mode:

  • All sensors active
  • Full interior motion detection
  • Maximum security
  • Use when leaving property
  • Shortest entry delay

Night mode (if available):

  • Downstairs sensors active
  • Upstairs sensors disabled
  • Perimeter protection
  • Family can move upstairs freely

Disarmed:

  • Sensors monitor but don’t alarm
  • Good for tracking (kids arriving home)
  • Cameras still record
  • No loud siren

Camera Motion Detection Tuning

Reducing false alerts:

Activity zones:

  • Define specific detection areas
  • Exclude streets, sidewalks, trees
  • Focus on driveways, walkways, doors
  • Ignore areas with frequent motion

Sensitivity adjustment:

  • Start high, reduce if too many alerts
  • Balance detection vs. false alarms
  • Consider time-based sensitivity
  • Test different settings

Filtering options:

  • Person detection (AI-powered)
  • Vehicle detection
  • Package detection
  • Pet detection (ignore animals)

Alert schedules:

  • More alerts when away
  • Fewer when home
  • Quiet hours (11 PM – 6 AM)
  • Vacation mode (maximum alerts)

Cloud Storage vs. Local Recording

Cloud storage (subscription):

  • Video accessible anywhere
  • Protected from local damage/theft
  • Easy sharing and playback
  • Costs $3-20/month per camera
  • Limited retention (7-60 days)

Local storage (SD card/NVR):

  • No monthly fees
  • Larger storage capacity
  • Privacy (not in cloud)
  • Vulnerable to theft/damage
  • Requires physical access for playback

Recommended approach:

  • Critical cameras: cloud backup
  • Interior cameras: local storage
  • Hybrid: local primary + cloud backup

Step 5: Establish Your Response Plan

Without professional monitoring, you must handle every alert.

Alert Response Protocol

Standard operating procedure:

Step 1: Alert received

  • Note exact time
  • Check what triggered alert
  • Determine location

Step 2: Verify via cameras

  • Open live camera feeds immediately
  • Check camera near triggered sensor
  • Look for actual intruder vs. false alarm
  • Record video if possible

Step 3: Assess situation

  • Real threat: proceed to Step 4
  • False alarm: disarm and investigate cause
  • Uncertain: err on side of caution (call police)

Step 4: Call emergency services

  • Dial 911
  • State: “I have a security alarm. Someone is breaking into my home at [address]”
  • Describe what you see on camera
  • Mention if anyone is home
  • Stay on line if safe to do so

Step 5: Alert trusted contacts

  • Notify spouse/family
  • Text trusted neighbor if nearby
  • Update once situation resolved

When You Can’t Respond

Addressing availability gaps:

Sleeping:

  • Ensure phone volume up
  • Use smartwatch for vibration alerts
  • Partner can share monitoring duty
  • Consider professional monitoring for night hours

Meetings/work:

  • Check phone regularly
  • Alert backup contact
  • Consider professional monitoring for weekdays
  • Use smartwatch for discreet notifications

Vacation:

  • Designated backup monitor
  • Professional monitoring add-on (temporary)
  • Trusted neighbor with access
  • More frequent self-checks

Illness/emergency:

  • Professional monitoring backup
  • Family member monitoring
  • Neighbor monitoring agreement

Backup Contact Network

Building your team:

Primary contact (yourself):

  • Receives all alerts
  • Main responder
  • System administrator

Secondary contact (spouse/partner):

  • Shares app access
  • Backup responder
  • Can arm/disarm system

Tertiary contact (trusted neighbor):

  • Emergency local response
  • Visual verification if needed
  • Limited app access (viewing only)

Emergency contact (family/friend):

  • Receives calls if can’t respond
  • Contacts authorities on your behalf
  • Has key or access code

Step 6: Regular Testing and Maintenance

Self-monitored systems require active upkeep.

Monthly Testing Routine

Comprehensive system test:

Sensor testing (15-20 minutes):

  1. Arm system in Away mode
  2. Open each door/window with sensor
  3. Verify push notification arrives within 5 seconds
  4. Check alert shows correct sensor name
  5. Walk past each motion detector
  6. Confirm siren sounds for real alarms

Camera testing:

  1. Check live view on each camera
  2. Verify night vision functionality
  3. Test motion detection
  4. Check recording (cloud or local)
  5. Verify two-way audio if applicable

App functionality:

  1. Test remote arm/disarm
  2. Check camera live streaming
  3. Verify notification settings
  4. Review activity log
  5. Test on backup device (tablet)

Battery and Power Management

Battery replacement schedule:

Sensor batteries:

  • Lifespan: 1-3 years typical
  • Replace when low-battery alert appears
  • Consider annual proactive replacement
  • Keep spare batteries on hand
  • Test after replacement

Camera batteries (wireless):

  • Lifespan: 2-6 months depending on activity
  • Recharge when below 20%
  • Consider wired power for high-traffic cameras
  • Solar panels for exterior cameras

Hub backup battery:

  • Tested during power outage simulation
  • Replace every 3-5 years
  • Ensures continued operation
  • Critical for cellular backup

Software Updates

Keep system current:

Firmware updates:

  • Enable automatic updates if available
  • Check monthly for manual updates
  • Read update notes for new features
  • Test system after major updates

App updates:

  • Update promptly (security patches)
  • Check for new features
  • Reinstall if app problems occur

Self-Monitoring vs. Professional Monitoring Comparison

Understanding what you’re trading for cost savings.

What Self-Monitoring Provides

Advantages:

  • No monthly fees ($300-600/year savings)
  • Full control over system
  • No contracts or commitments
  • DIY installation
  • Privacy (no external monitoring)
  • Instant alerts to your phone

What you must handle:

  • 24/7 alert response
  • Calling police yourself
  • Determining real vs. false alarms
  • System maintenance
  • Battery replacements
  • Technical troubleshooting

What Professional Monitoring Adds

Professional monitoring benefits:

24/7 trained response:

  • Experts monitor alerts always
  • Verify emergencies before dispatch
  • Call you first, then police
  • Handle alerts when you’re unavailable
  • Reduce false alarm police calls

Enhanced capabilities:

  • Video verification of alarms
  • Priority police response in some areas
  • Fire and medical dispatch
  • System health monitoring
  • Equipment warranty coverage

Peace of mind:

  • Guaranteed response
  • Works when asleep, traveling, busy
  • Reduces homeowner burden
  • Insurance discounts (10-20%)

Atlanta’s Professional Monitoring Option

Callaway Security: Flexible Monitoring Solutions

Callaway Security understands some homeowners prefer self-monitoring while others want professional backup.

Hybrid Monitoring Options:

Full Professional Monitoring:

  • 24/7 UL-approved monitoring station
  • 5 Diamond Certified (top 3% nationwide)
  • Immediate verified emergency dispatch
  • Video verification capability
  • Fire, CO, medical, intrusion monitoring
  • Cellular backup included
  • Monthly rate: Competitive pricing

Vacation/Temporary Monitoring:

  • Professional monitoring for travel periods
  • Activate when away, self-monitor when home
  • No long-term contract required
  • Pay only for months needed
  • Perfect for hybrid approach

Professional Installation with Self-Monitoring:

  • Expert system design and installation
  • Professional equipment quality
  • Proper sensor placement
  • Network security configuration
  • Camera positioning expertise
  • You handle monitoring via app
  • Technical support available

Why Consider Professional Monitoring:

Scenario 1 – While sleeping:

  • Self-monitoring: Phone on silent, miss alert
  • Professional: Automatic fire department dispatch saves family

Scenario 2 – On vacation:

  • Self-monitoring: Limited international connectivity, can’t respond
  • Professional: Guaranteed response regardless of your location

Scenario 3 – Medical emergency:

  • Self-monitoring: Incapacitated, can’t call for help
  • Professional: Medical alert dispatch even if unconscious

Scenario 4 – False alarm:

  • Self-monitoring: Call police, potential false alarm fine ($25-200)
  • Professional: Video verification prevents unnecessary dispatch

True cost comparison (annual):

Self-monitoring:

  • Equipment: $400 (one-time)
  • Cloud storage: $120/year
  • Total first year: $520
  • Annual ongoing: $120

Professional monitoring:

  • Equipment: $600 (better quality)
  • Monitoring: $420/year ($35/month)
  • Insurance savings: -$150/year
  • Total first year: $1,020
  • Annual ongoing: $270 (net after insurance)

Net difference: $150/year for guaranteed 24/7 professional response

Many homeowners find this modest investment worthwhile for comprehensive protection, especially for:

  • Families with children
  • Elderly residents
  • Frequent travelers
  • Large/valuable properties
  • High-crime areas

Callaway Security offers both:

  • Self-monitoring with professional equipment
  • Professional monitoring for complete peace of mind
  • Flexible switching between modes
  • No pressure, just options

Contact Callaway Security to Discuss Your Monitoring Needs →

Common Self-Monitoring Challenges

Realistic obstacles and solutions.

Alert Fatigue

Problem: Too many notifications cause you to ignore alerts

Solutions:

  • Tune motion detection zones carefully
  • Adjust sensitivity settings
  • Use scheduled alerts (more when away)
  • Enable critical alerts only
  • Review and refine weekly

Response Burnout

Problem: Constant vigilance is exhausting

Solutions:

  • Set realistic expectations
  • Use backup monitors
  • Consider professional monitoring nights/weekends
  • Take monitoring breaks with backup
  • Automate what’s possible

Technology Failures

Problem: Internet outage, dead battery, app crashes

Solutions:

  • Cellular backup (critical)
  • Battery backup for hub
  • Redundant systems (backup cameras)
  • Regular testing catches issues
  • Keep equipment updated

False Alarm Management

Problem: Police fines, boy-who-cried-wolf syndrome

Solutions:

  • Always verify via camera before calling police
  • Learn your system’s false trigger patterns
  • Fix root causes (loose sensors, pets)
  • Use backup verification methods
  • Consider professional verification

Frequently Asked Questions About Self-Monitoring

Can I self-monitor any security system?

Not all systems support self-monitoring. Look for systems specifically designed for DIY monitoring without contracts (SimpliSafe, Ring, Abode, Wyze). Traditional professional systems (older ADT, Vivint) may not function without monitoring contracts. Modern systems increasingly offer flexible monitoring options. Check specifications before purchasing.

Do I save money with self-monitoring?

Yes, significantly. Professional monitoring costs $25-50/month ($300-600/year), while self-monitoring requires only optional cloud storage ($0-240/year). However, you lose insurance discounts (typically 10-20% of premium, often $100-300/year) and must handle all responses yourself 24/7. Net savings typically $200-500/year for self-monitoring.

What happens if my internet goes down?

Systems with cellular backup continue sending alerts to your phone via cellular network. Without cellular backup, you lose remote monitoring but local siren still sounds. This is why cellular backup ($10-15/month or included) is critical for self-monitoring. Consider it mandatory, not optional.

How do I avoid false alarm police fines?

Always verify alerts via camera before calling police. Many cities charge $25-200 per false alarm after first 1-2 free incidents annually. Video verification ensures you only call police for real threats. This is actually easier with self-monitoring than letting automated system call police without verification.

Can I switch from self-monitoring to professional later?

Yes, most modern systems (SimpliSafe, Ring, Abode) allow switching between self-monitoring and professional monitoring anytime. Simply subscribe to monitoring service when desired. Some systems offer on-demand monitoring (professional monitoring only when traveling). Equipment typically compatible with both approaches.

Is self-monitoring safe enough for families?

Depends on your situation and commitment. Self-monitoring works well for tech-savvy, attentive homeowners who respond promptly to alerts. Less ideal for families with young children, elderly, disabled, or frequent travelers. Consider hybrid approach: self-monitor normally, professional monitoring during sleep/travel. Many families find peace of mind of professional monitoring worth modest cost.

Maximizing Self-Monitoring Success

Effective self-monitoring requires commitment and proper setup.

Your self-monitoring success checklist:

Equipment setup:
☐ Choose self-monitoring compatible system
☐ Install sensors at all entry points
☐ Position cameras strategically
☐ Enable cellular backup
☐ Configure battery backup
☐ Test all components thoroughly

App configuration:
☐ Download and secure app
☐ Enable push notifications
☐ Configure alert settings
☐ Set up backup monitors
☐ Tune motion detection zones
☐ Test remote access

Response planning:
☐ Create written response protocol
☐ Establish backup contact network
☐ Save emergency numbers
☐ Test response procedure
☐ Brief all household members

Ongoing maintenance:
☐ Monthly system testing
☐ Battery monitoring and replacement
☐ Software updates
☐ Alert tuning refinement
☐ Annual full system review

Realistic assessment:
☐ Can you respond 24/7?
☐ Have reliable backup monitors?
☐ Comfortable calling police yourself?
☐ Technical skills adequate?
☐ Worth the $300-500/year savings?

Consider Your Complete Options

Self-monitoring works well for many homeowners but isn’t ideal for everyone. Understanding your options helps you choose what’s best for your family.

Callaway Security provides flexible solutions:

  • Professional equipment with self-monitoring option
  • Professional monitoring when you want guaranteed response
  • Hybrid approaches for different situations
  • Expert installation ensures optimal performance
  • Technical support when you need help

The right monitoring approach depends on your lifestyle, budget, and peace of mind needs.

Contact Callaway Security to Explore Your Monitoring Options →

Self-Monitoring Your Home Security: Is It Right For You?

Self-monitoring home security systems requires choosing compatible equipment (SimpliSafe, Ring, Abode), installing comprehensive sensors and cameras, connecting via smartphone app with properly configured alerts, establishing clear response protocols, and committing to 24/7 alert responsiveness. While self-monitoring saves $300-600 annually in professional monitoring fees, it demands personal responsibility for emergency calls, system maintenance, and constant availability—trade-offs many families find challenging.

The question isn’t “can you self-monitor?” but “should you?” For tech-savvy, attentive homeowners comfortable with DIY responsibility, self-monitoring provides excellent value. For families wanting guaranteed response regardless of availability, professional monitoring’s modest cost ($25-50/month) provides irreplaceable peace of mind.

Choose the monitoring approach that matches your lifestyle, availability, and commitment level—your family’s protection depends on honest self-assessment.

Picture of Robert Callaway
Robert Callaway
Robert Callaway is the owner of Callaway Security & Sound and has been serving homeowners and businesses across the Atlanta metro area since 1991. With decades of hands-on experience in system design, installation, and service, his focus is on practical security solutions, honest guidance, and long-term reliability.
Callaway Security Logo

Looking for Home Security?

We're Just A Call-Away!