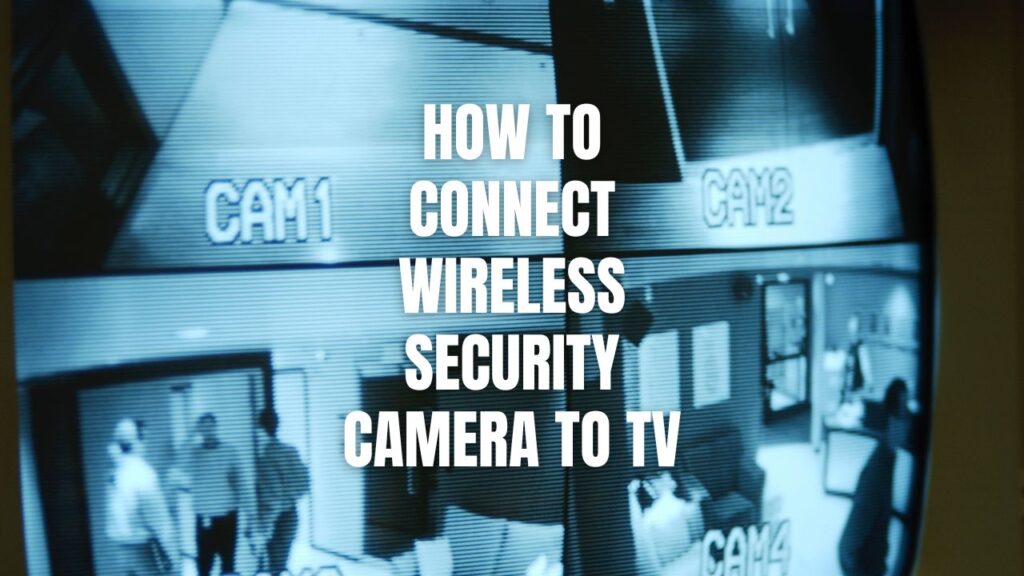
We can connect wireless security cameras to our TVs in 5 main ways – through smart TV apps, streaming devices like Chromecast, NVR systems, wireless HDMI receivers, or direct HDMI cables. The easiest method is using your smart TV’s app store or casting from your phone.
Getting your security camera feed on the big screen is easier than you might think! Whether you want to keep an eye on the kids, check who’s at the front door, or monitor your property, we’ll show you exactly how to get those camera feeds displaying on your television.
Key Takeaways:
- Smart TV apps – Download camera apps directly to your TV (easiest for most people)
- Phone casting – Use Chromecast, Roku, or Fire TV to stream from your mobile app
- NVR systems – Professional setup that handles multiple cameras at once
- Wireless HDMI – Plug-and-play solution for compatible camera kits
- Direct connection – HDMI cable straight from camera to TV
- Strong Wi-Fi is crucial – Your network speed determines video quality
- Most methods are DIY-friendly – No need to call a tech expert!

Method 1: Smart TV Apps (Recommended for Beginners)
What it is: Download your camera’s app directly onto your smart TV – no extra devices needed!
This is hands-down the easiest way to get started. Most modern smart TVs (think Samsung, LG, Sony) can run security camera apps just like your phone does.
Step-by-Step Setup
Step 1: Get Your Camera Online
- Connect your wireless camera to your home Wi-Fi
- Use the camera’s mobile app to set this up first
- Write down your camera’s IP address (you’ll find this in the app settings)
Step 2: Find the Right TV App
- Open your TV’s app store (Smart Hub, LG Content Store, etc.)
- Search for your camera brand’s official app
- Popular options: Ring, Arlo, Nest, or generic apps like “TinyCam Monitor”
Step 3: Connect Everything
- Download and open the app on your TV
- Add your camera by entering its IP address and password
- Most apps will auto-detect cameras on your network
Step 4: Start Watching
- Select your camera from the app
- Adjust video quality if needed
- Enjoy your big-screen security monitoring!
Pro Tips for Smart TV Apps
| TV Brand | Best Apps | Special Features |
|---|---|---|
| Samsung | SmartThings, TinyCam | Works with Samsung cameras |
| LG | IP Camera Viewer | WebOS integration |
| Sony | Generic IP apps | Android TV compatibility |
| Roku TV | Roku Channel Store apps | Simple interface |
Method 2: Streaming Devices (Most Popular)
What it is: Use devices like Chromecast, Fire TV, or Apple TV to “cast” your phone’s camera app to the TV.
This method rocks because you probably already have a streaming device, and it works with virtually any camera app on your phone.
Using Google Chromecast
The Setup Process:
- Get everything on the same Wi-Fi – Your phone, Chromecast, and camera all need to be on your home network
- Open your camera app on your smartphone
- Look for the cast icon (looks like a rectangle with Wi-Fi waves)
- Tap it and select your Chromecast
- Boom! Your camera feed appears on the TV
Using Amazon Fire TV
Two ways to do this:
- Option A: Download your camera’s app directly from the Fire TV app store
- Option B: Use screen mirroring from your Android phone
For screen mirroring:
- Hold the Home button on your Fire TV remote
- Select “Mirroring”
- On your phone, go to Settings > Display > Cast
- Select your Fire TV device
Using Apple TV
Perfect for iPhone users! Just use AirPlay:
- Open your camera app on iPhone/iPad
- Swipe down from top-right corner
- Tap “Screen Mirroring”
- Choose your Apple TV
- Enter the code if prompted
Quick Comparison Table
| Device | Best For | Ease of Use | Cost |
|---|---|---|---|
| Chromecast | Android users | ⭐⭐⭐⭐⭐ | $30-50 |
| Fire TV | Amazon ecosystem | ⭐⭐⭐⭐ | $25-55 |
| Apple TV | iPhone users | ⭐⭐⭐⭐⭐ | $130-180 |
| Roku | Simple interface | ⭐⭐⭐⭐ | $30-100 |
Method 3: NVR Systems (For Multiple Cameras)
What it is: A dedicated box that connects to multiple cameras wirelessly and plugs into your TV via HDMI.
Think of an NVR (Network Video Recorder) as the “brain” of a professional security system. It’s perfect if you have several cameras around your property.
How NVR Systems Work
The Magic Behind It:
- The NVR creates its own wireless network
- Cameras connect to this private network (not your home Wi-Fi)
- You get a dedicated interface showing all cameras at once
- Everything connects to your TV with a single HDMI cable
Setting Up Your NVR
Step 1: Position the NVR Hub
- Place it centrally for best wireless coverage
- Keep it near your TV for easy HDMI connection
- Ensure good ventilation (these boxes can get warm)
Step 2: Pair Your Cameras
- Most systems use simple button pairing
- Press sync buttons on both NVR and camera
- Some newer systems use QR codes for pairing
Step 3: Connect to TV
- Run HDMI cable from NVR to TV
- Select the correct HDMI input
- Use the included remote to navigate
NVR System Benefits
| Feature | Benefit | Why It Matters |
|---|---|---|
| Multiple cameras | View 4-16 cameras at once | Complete property coverage |
| Private network | No Wi-Fi congestion | Reliable connection |
| Built-in recording | Automatic footage storage | Evidence preservation |
| Professional interface | Easy camera switching | User-friendly operation |
Method 4: Wireless HDMI Receivers
What it is: A special receiver that plugs into your TV and gets wireless video signals from compatible cameras.
This is the “set it and forget it” option. If your camera system includes a wireless HDMI transmitter, this method gives you the cleanest setup.
How Wireless HDMI Works
The Simple Process:
- Plug receiver into TV – Goes into any HDMI port
- Power on your camera – It automatically transmits to the receiver
- Switch TV input – Select the HDMI port with the receiver
- Watch your feed – Clean, direct video with no apps needed
Pros and Cons
Advantages:
- Zero network setup required
- Excellent video quality (uncompressed signal)
- Works up to 300+ feet in open areas
- No app crashes or updates to worry about
Limitations:
- Only works with compatible camera systems
- Can’t mix different brands
- Possible interference from other wireless devices
- More expensive than app-based solutions
Method 5: Direct HDMI Connection
What it is: Some cameras have HDMI ports – just plug a cable straight from camera to TV!
This old-school method is bulletproof reliable. No Wi-Fi, no apps, no fuss.
When to Use Direct HDMI
Perfect scenarios:
- Camera is close to your TV (within cable reach)
- You want zero wireless interference
- Maximum reliability is crucial
- You’re monitoring a specific area constantly
Setup Steps
- Check your camera – Look for an HDMI output port
- Get the right cable – Usually standard HDMI to HDMI
- Connect camera to TV – Plug and play!
- Select HDMI input – Switch your TV to the right source
- Adjust camera settings – Use camera’s built-in menus
Troubleshooting Common Problems
“I Can’t See My Camera Feed!”
Quick fixes to try:
- Double-check your Wi-Fi password in the camera app
- Restart your router (unplug for 30 seconds)
- Make sure camera and TV are on the same network
- Update your camera’s mobile app
- Verify the camera’s IP address hasn’t changed
“The Video Keeps Freezing”
Bandwidth solutions:
- Move your router closer to the camera
- Reduce video quality in camera settings
- Check other devices aren’t hogging bandwidth
- Consider upgrading your internet plan
- Use 5GHz Wi-Fi instead of 2.4GHz if available
“My TV App Crashes”
App troubleshooting:
- Clear the app’s cache and data
- Uninstall and reinstall the app
- Update your TV’s firmware
- Restart your smart TV completely
- Try a different camera app
Security Tips to Keep You Safe
Change Default Passwords
Why it matters: Most cameras come with passwords like “admin” or “123456” – hackers know these!
What to do:
- Create strong, unique passwords for each camera
- Use a mix of letters, numbers, and symbols
- Change passwords every few months
- Never share passwords with others
Set Up Network Security
Guest network approach:
- Put cameras on a separate guest network
- This isolates them from your main devices
- Prevents potential security breaches from spreading
Router security checklist:
- Enable WPA3 encryption (or WPA2 minimum)
- Turn off WPS (Wi-Fi Protected Setup)
- Regularly update router firmware
- Change router admin password
Cost Breakdown by Method
| Method | Equipment Needed | Typical Cost | Monthly Fees |
|---|---|---|---|
| Smart TV App | Just your TV | Free | Maybe cloud storage |
| Chromecast | Chromecast device | $30-50 | Possible cloud fees |
| Fire TV | Fire TV Stick/Box | $25-55 | Amazon Prime helpful |
| NVR System | NVR + cameras | $200-800 | Usually none |
| Wireless HDMI | Compatible system | $150-400 | None |
| Direct HDMI | HDMI cable | $10-30 | None |
Which Method Should You Choose?
For Tech Beginners
Go with: Smart TV apps or Chromecast casting
Why: Simple setup, uses familiar phone apps, minimal cost
For Multiple Cameras
Go with: NVR system
Why: Professional interface, handles many cameras, reliable
For Maximum Reliability
Go with: Direct HDMI or wireless HDMI
Why: No network dependence, consistent performance
For Budget-Conscious Users
Go with: Smart TV apps or basic streaming device
Why: Uses existing equipment, minimal additional cost
Popular Camera Apps That Work Great
Universal Apps (Work with Most Cameras)
- TinyCam Monitor – Supports 8000+ camera models
- IP Camera Viewer – Simple interface, works on most smart TVs
- Security Camera CZ – Good for mixing different camera brands
Brand-Specific Apps
- Ring – Amazon Ring cameras and doorbells
- Nest – Google Nest cameras and hubs
- Arlo – Arlo wireless camera systems
- Wyze – Budget-friendly Wyze cameras
Network Optimization Tips
Internet Speed Requirements
For each camera, you need:
- Standard definition: 1-2 Mbps upload speed
- High definition (720p): 2-4 Mbps upload speed
- Full HD (1080p): 4-6 Mbps upload speed
- 4K cameras: 8-12 Mbps upload speed
Router Placement Tips
Best practices:
- Position router centrally in your home
- Keep it elevated (on a shelf, not the floor)
- Avoid metal objects and thick walls nearby
- Point antennas vertically for best coverage
- Consider mesh systems for large homes
Future-Proofing Your Setup
What’s Coming Next
AI-powered features:
- Smart person/package/pet detection
- Automatic alerts for unusual activity
- Voice control integration
- Improved night vision capabilities
5G connectivity:
- Cameras that don’t need Wi-Fi
- Faster upload speeds for better quality
- More reliable rural installations
Better integration:
- Seamless smart home connections
- Improved TV app experiences
- Cloud storage getting cheaper and better
Frequently Asked Questions
Can I watch multiple cameras on one TV screen?
Absolutely! Most methods support multi-camera viewing. NVR systems excel at this with split-screen layouts showing 4, 8, or even 16 cameras simultaneously. Smart TV apps often support 2-4 cameras in split view, while casting from phones depends on your camera app’s features.
Do I need internet to view my cameras on TV?
For live viewing on your local network, internet isn’t required once everything’s set up. However, you’ll need internet for initial app downloads, camera configuration, and any cloud features. NVR systems work completely offline after setup.
Will this slow down my internet?
Local viewing (camera to TV on your home network) barely affects internet speed. Cloud-based viewing and remote access do use your internet upload bandwidth, but modern broadband connections handle this easily for most households.
What if my Wi-Fi goes down?
This depends on your setup method. NVR systems with dedicated wireless networks keep working normally. Direct HDMI connections aren’t affected at all. Smart TV apps and casting methods will lose connection until Wi-Fi returns.
Can I view recorded footage on my TV?
Yes! NVR systems have extensive playback features with timeline scrubbing and search functions. Many smart TV apps access cloud recordings, though playback features may be simpler than dedicated NVR interfaces.
Final Thoughts: Getting Your Security Cameras on the Big Screen
Setting up wireless security cameras on your TV doesn’t have to be complicated or expensive. Whether you choose the simplicity of smart TV apps, the versatility of streaming devices, or the professional capabilities of NVR systems, you’ll have peace of mind seeing your property on the big screen.
Start simple – Try the smart TV app method or phone casting first. These approaches work great for most people and don’t require buying additional equipment. You can always upgrade to more sophisticated systems later as your needs grow.
Think about your long-term needs – If you plan to add more cameras or want professional features, starting with an NVR system might save money in the long run. For basic monitoring of one or two areas, app-based solutions work perfectly.
Don’t forget the basics – A strong Wi-Fi network and proper security settings matter more than having the fanciest equipment. Make sure your foundation is solid before adding complexity.
The technology keeps getting better and easier to use. What seemed complicated just a few years ago is now as simple as downloading an app. Take advantage of these improvements to create a security system that works for your lifestyle and budget.
Remember, the best security camera system is the one you’ll actually use. Choose the method that feels comfortable and sustainable for your tech skills and daily routine. Your peace of mind is worth the small effort to get everything connected properly! Callaway Security™ is here to help you with wireless installation of your security cameras!

